In the previous how-to, I explained how to add a grep expression and a style to highlight a line. This time, I’ll show some alternate ways of creating expressions.
We start out just where we took off last time. This is our demo program:
public static void main(String[] args)
{
  System.out.println("This is the first line.");
  System.out.println("Some more text...");
  System.out.println("This is the second line.");
  System.out.println("Some more text...");
  System.out.println("This is the third line.");
}
Let’s begin with a feature for which I received many requests in version 2 of Grep Console: You can now export and import a settings. Exporting works by clicking “Save all” or “Save selected” from the Grep Console dialog. This will open a file dialog to write either all folders and expressions plus their associated styles to an XML file, or just those you’ve currently selected. Afterwards, you can import them via the “Load” button. If you no longer have the expression created in the previous how-to, here’s the file – just import it.
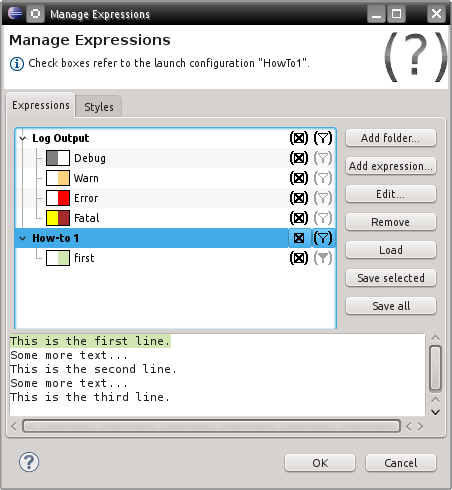
This is what your configuration should look like before we continue (never mind if you’ve modified or deleted the default debug/warn/error/fatal expressions, we won’t be needing those):
 So, let’s have a look at how else we can add new expressions. Run the demo program and have a look at the console. It should look like this:
 We now want to add highlighting to every line containing the string “second”. Select that word in your console, by click-dragging with your mouse or by double clicking it. Now right click to open the context menu. You’ll see a menu entry with the Grep Console icon labelled “Add expression”:
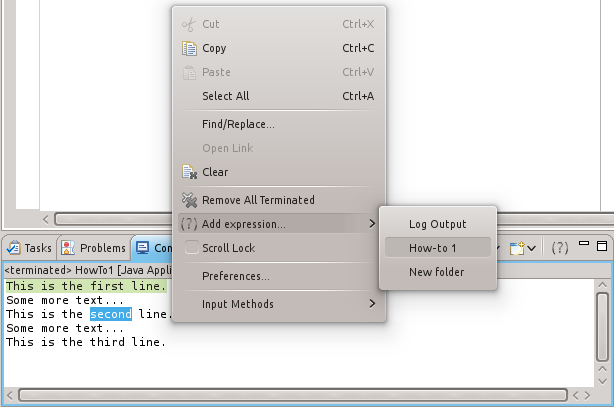 Select that, and in the sub menu that appears, select “How-to 1” – which is the folder we created last time, and which is where we want to create the new expression. (You could click “Log Output” here to add the new expression to the default folder of log expressions instead, or “New folder” to create a new folder to which the expression will be added – Grep Console will prompt you for a folder name in this case).
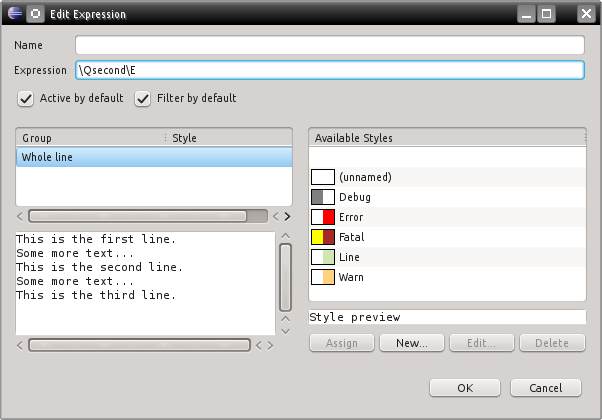
Now the edit expression dialog will open directly, looking like this:
As you can see, Grep Console automatically filled in the expression this time. It wrapped it with a “\Q…\E” string, which in Java regular expressions means that everything in between should be treated as is. That means that our string could contain special characters like “.” or “\”, but they still wouldn’t be treated as regular expression characters. In our case, the string is simple, so they’re not necessary, but Grep Console adds them anyway, just to be on the safe side.
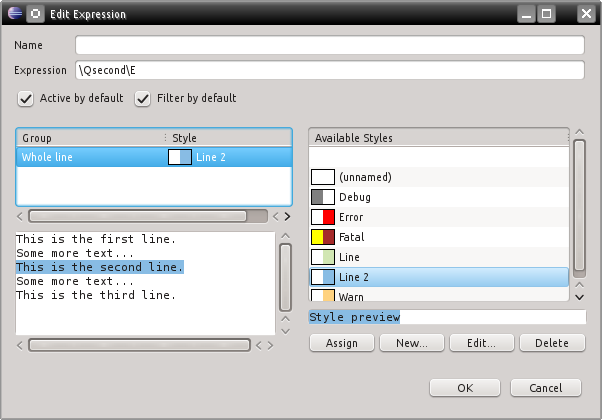
We want the new expression to use a new style, so that the second line is highlighted in a different colour. While the “whole line” group has no style assigned yet, we can double click on it to create a new one. I named it “Line 2” and set “88bce4” as the background colour:
Note how the preview shows the correct highlight for the second line, but leaves the others unstyled, including the first one. That’s because it’s a preview specifically for the expression we’re currently editing.
Click “Ok” to close the dialog, and the console will highlight both the first and the second line according to our two expressions:
For a third way to add an expression, open the Grep Console dialog again by clicking on the icon in the toolbar. You’ll notice that the preview is showing the current console output so that we can already see our current expressions in action.
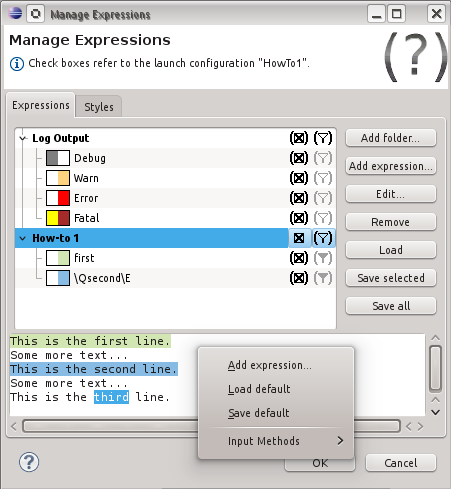
In the preview text, just like in the console, a context menu allows use to add an expression for the currently selected string. The difference is that here we don’t have a sub menu to select the target folder – the expression is always added to the folder currently selected in the table above the preview.
Select our folder in the table, then select the string “third” in the preview and right-click:
Click “add expression”. Once again, the expression dialog will open. We want to use the same colour for the third line that we already used for the first one, so instead of creating a new style, this time we’ll simply assign the old “Line” style by selecting it and clicking “Assign” (or double clicking it).
Here’s the final result:
Another word on the preview in the Grep Console dialog: If there were no current console, or we had opened the settings from Eclipse’s preference dialog, the preview would show some default text instead. You can always load that default text by right-clicking the preview and selecting the corresponding menu entry. You can also freely edit the preview text – just type whatever you want and see your expressions applied to it live. You can use the context menu to save the current text as the new default for later reuse.
The preview in the expression dialog offers similar features in the preview. Instead of creating a new expression, here you can set the expression item’s grep expression from the selected text.
Next time we’ll have a look at regular expression groups.

